Pixel art for baboons

Hello! My name is Yasuke! I’m a NFT pixel artist working on Solana! This is the first article in a series of pixel art tutorials. In this one we will cover only the basics: software, tools, how to create a file, which canvas size to choose and we will speak about the main pixel art limitations.
I want to thank all my friends from Solana NFT space! Thank you all for your support and interest for my art!
Introduction to Pixel Art
The important thing to understand about pixel art is that it has quite a few of notable differences compared to other art mediums. Of course, if you are familiar with drawing it will be a big advantage for you compared to starting from the ground zero. But if you don’t pay attention to pixel art features and don’t know the pixel art “theory”, it will be noticeable and really will bring your work down.
Historically pixel art appeared as an art form in response to limitations of gaming industry. Super Mario Bros took only 41 KBs. That challenged the artists for making sprites in such low resolution and with such low numbers of colors as possible. Of course, nowadays we don’t have such problems but those limitations are what makes pixel art differ from other art forms. Less is more in case of pixel art that for sure!

But you will definitely need to study anatomy, shading, perspective and color theory and other stuff from neighboring art disciplines in order to make your pixel art good.
Software and tools
There’s a couple of ways you can make pixel art. You either can use software which is not specialized specifically for pixel art (Photoshop, Procreate) or use something specific for pixel art. And in the second category absolute champion is Aseprite. Most of pixel artist in the space use it! myself included :) Aseprite is not a free app, you can buy it on Steam. Aseprite is not available on an Ipad.
Regarding tools I work on my laptop with mouse and keyboard. Also, I have a graphic tablet which I rarely use. Graphic tablet is very useful when you draw high resolution art or work on a big canvas, otherwise it will cause you more problems than help.

Getting started
So you bought Aseprite! Time to click File -> New the following window will appear:

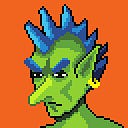
The main thing you should focus on is a canvas size, we are not so interested in other options for now. Canvas size is very important, it determines the style for the whole piece. There are many examples of how canvas size changes the style of pixel art. I don’t work in high-res, my style is cartoonish and goofy so I stick to small canvas size. PFPs I make is 64x64 pixels, my self-portrait you’ve seen above is 80x60, Roadside Vendors have resolution of 384x364 (and the actual “working area” is 340x240). So even in the bigger pieces I limit myself pretty hard. And you should too! — challenges are what makes pixel art so exciting. So, for beginners I strongly recommend stick to smaller canvas size!
After you created your fresh new file, your screen will look like this:

So on the left side you have your palette, we will be disccussing color theory in other article cause that an important topic. For now, you can safely use aseprite presets. You may access them by clicking small page icon on the top of your palette.

You may choose any you want but I recommend avoiding palettes with a lot of colors in it.
On the right side you have a bunch of tools, you can learn about them by hovering over with your mouse, they are pretty basic and similar to many art softwares so I won’t be talking much about them.
The bottom panel is used for managing layers and frames. We won’t be using any frames today cause discussing animation requires a bunch of topics and today we are only getting started. You may hide the bottom panel by pressing Tab.
Also, you can open Preview window by clicking small 1:1 icon on the bottom right. I use that one a lot! It easy to lose the track of overall piece when you’re working on details. You can resize that window and move it in any way you want.

So after everything is set up, we finally can start drawing!
Finally! Drawing!
Your main tool for drawing is Pencil, shortcut: B. Your main assistant is Eraser, shortcut: E. If you screwed up you can use Control+Z to cancel the changes (you will be using it a lot). For filling whole area with color use Paint Bucket Tool, shortcut is G. Now finally draw something! I’ve drawn a little 16x16 potion for an example (Palette: ARQ4)

Drawing with such small size canvas + with only four colors is very challenging, but it’s a very good practice cause making things recognizable with all those challenges is a big part of making pixel art. I would love to see what some of you can do with those. Please share on twitter if you decide to try it! :)
Now it’s time to save, you can press the Shift+S to quick-save your file, and I recommend you teach yourself to do it very often so you don’t lose your work by accident (I learned it the hard way). When you quick-save your file is saved in .aseprite format it means it carries the data about your used layers, pallet etc. if you save as .jpeg/.png/.gif your layers will be gone and only the presented colors will be in a palette. In order to save file in other format use Control+Shift+S. Click the File type and choose the format you want.
p.s. Of course you can click File->Save/Save as but I recommend you learn the shortcuts.

But wait! If you save your work as PNG (for example) it will look like this:

That’s because we didn’t change the resolution and it’s still 16x16 pixels. In order to resize your work you should go to Sprite -> Sprite Size.

Make sure the Lock Ratio option is checked so your work doesn’t get scuffed. It also might get scuffed if you decide to resize it by some weird percentage (247 % for example) keep that percentages number nice and round (either go for 200 or for 300%) that guarantees your work will look the same after resizing. Resized potion:

What’s next!?
Now I would love you to experiment maybe with higher canvases maybe 32x32 or even 48x48, try different color pallets but stick to low colors number count maybe 12 or 16 for a start. If you are not happy with Aseprite presets I would love to share resource I use for getting my palettes, it’s wonderful resource it will make your life significantly easier as an artist.
If you just started with pixel art my advice is to avoid animation for now, there’s much more stuff to learn and I don’t want to make these reads too long.
Also I advise you check and learn the works of other pixel artists in the space and outside of it (sadly)!
This article in particular is mainly for complete beginners I bet those who are familiar with Aseprite didn’t find it very useful. But this article is a sort of a pilot, for me to try something new and to see if this format is sustainable. More things to come!
Love you all!
- Yasuke